Deploy for production
You can deploy Besu for production on a Kubernetes cluster.
Prerequisites
- Clone the Quorum-Kubernetes repository
- A running Kubernetes cluster
- Kubectl
- Helm3
Overview
To get things production-ready, we'll use the same charts, and set a few of the values in the cluster map as in the Deploy section.
The following tutorial ONLY supports AWS and Azure currently. Other cloud providers will be added in time.
We recommend using AWS RDS or Azure PostgreSQL in High Availability mode for any Tessera nodes that you use. The templates don't include that functionality. They can be provisioned with CloudFormation or Azure Resource Manager, respectively. Once created, please specify the connection details to the values.yml.
Deploy
Check that you can connect to the cluster with kubectl
Once you have a cluster running, verify kubectl is connected to cluster with:
kubectl version
Client Version: version.Info{Major:"1", Minor:"23", GitVersion:"v1.23.1", GitCommit:"86ec240af8cbd1b60bcc4c03c20da9b98005b92e", GitTreeState:"clean", BuildDate:"2021-12-16T11:41:01Z", GoVersion:"go1.17.5", Compiler:"gc", Platform:"linux/amd64"}
Server Version: version.Info{Major:"1", Minor:"22", GitVersion:"v1.22.3", GitCommit:"c92036820499fedefec0f847e2054d824aea6cd1", GitTreeState:"clean", BuildDate:"2021-10-27T18:35:25Z", GoVersion:"go1.16.9", Compiler:"gc", Platform:"linux/amd64"}
Deploy the network
For the rest of this tutorial we use Helm charts. After you have cloned the Quorum-Kubernetes repository, change the directory to helm for the rest of this tutorial.
cd helm
Each helm chart has the following keys that must be set.
Specify either aws or azure for the cluster.provider. Additionally, set cloudNativeServices: true and reclaimPolicy: Retain so that it looks like the following for AWS:
cluster:
  provider: aws  # choose from: aws | azure
  cloudNativeServices: true # set to true to use Cloud Native Services (SecretsManager and IAM for AWS; KeyVault & Managed Identities for Azure)
  reclaimPolicy: Retain # set to either Retain or Delete; note that PVCs and PVs will still exist after a 'helm delete'. Setting to Retain will keep volumes even if PVCs/PVs are deleted in kubernetes. Setting to Delete will remove volumes from EC2 EBS when PVC is deleted
Follow the steps outlined in the deploy charts tutorial to deploy the network.
Best practices
The most important thing is to plan your network out on paper first and then test it in a Dev cluster to make sure connectivity works with your applications and you get the required throughput in transactions per second (TPS). We also recommend you test the entire process, from provisioning infrastructure to updating nodes on a Dev cluster, prior to launching your production network.
By default, the cloud Kubernetes clusters take care of availability and do multi-zones within a region. The scheduler also ensures that deployments are spread out across zones. Where possible, we recommend you use multiple bootnodes and static nodes to speed up peering.
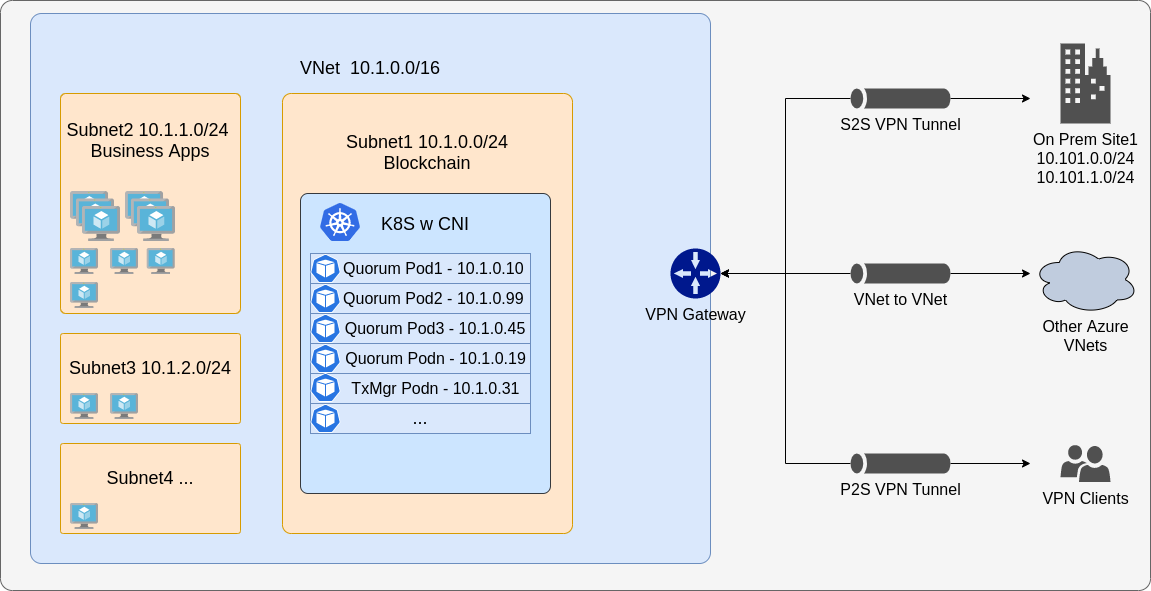
You can connect to APIs and services outside the cluster normally, but connecting into your network (such as adding an on-premise node to the network) might require more configuration. Please check the limitations and use CNI where possible. To connect an external node to your cluster, the easiest way is to use a VPN as seen in the following multi-cluster setup.
Finally, we recommend setting up monitoring and alerting from the beginning, so you can get early warnings of issues rather than after failure. We have a monitoring chart which uses Grafana and you can use it with Alertmanager to create alerts or alternatively alert via Cloudwatch or Azure Monitoring.
Multi-cluster support
When CNI is used, multi-cluster support is simple, but you have to cater for cross-cluster DNS names. Ideally, you want to create two separate VPCs (or VNets) and make sure they have different base CIDR blocks so that IP addresses don't conflict. Once done, peer the VPCs together and update the subnet route table, so they are effectively a giant single network.

When you spin up clusters, use CNI and CIDR blocks to match the subnet's CIDR settings. Then deploy the genesis chart on one cluster and copy across the genesis file and static nodes config maps. Depending on your DNS settings, they might be fine as is, or they might need to be actual IP addresses. That is, you can provision cluster B only after cluster A has Besu nodes up and running.
Deploy the network on cluster A, and then on cluster B. Besu nodes on cluster A should work as expected, and Besu nodes on cluster B should use the list of peers provided to communicate with the nodes on cluster A.
Keeping the list of peers on the clusters live and up to date can be challenging, so we recommend using the cloud service provider's DNS service such as Route 53 or Azure DNS and adapting the charts to create entries for each node when it comes up.